
Get Some Jeans
The first pair of denim I chose to cut were old, and I suggest you start off the same. Now that I consider myself a pro at DIY distressing, I feel more comfortable using a new pair. I also recommend using skinny jeans – but any style denim will work. You can even try this trend on your denim jackets!
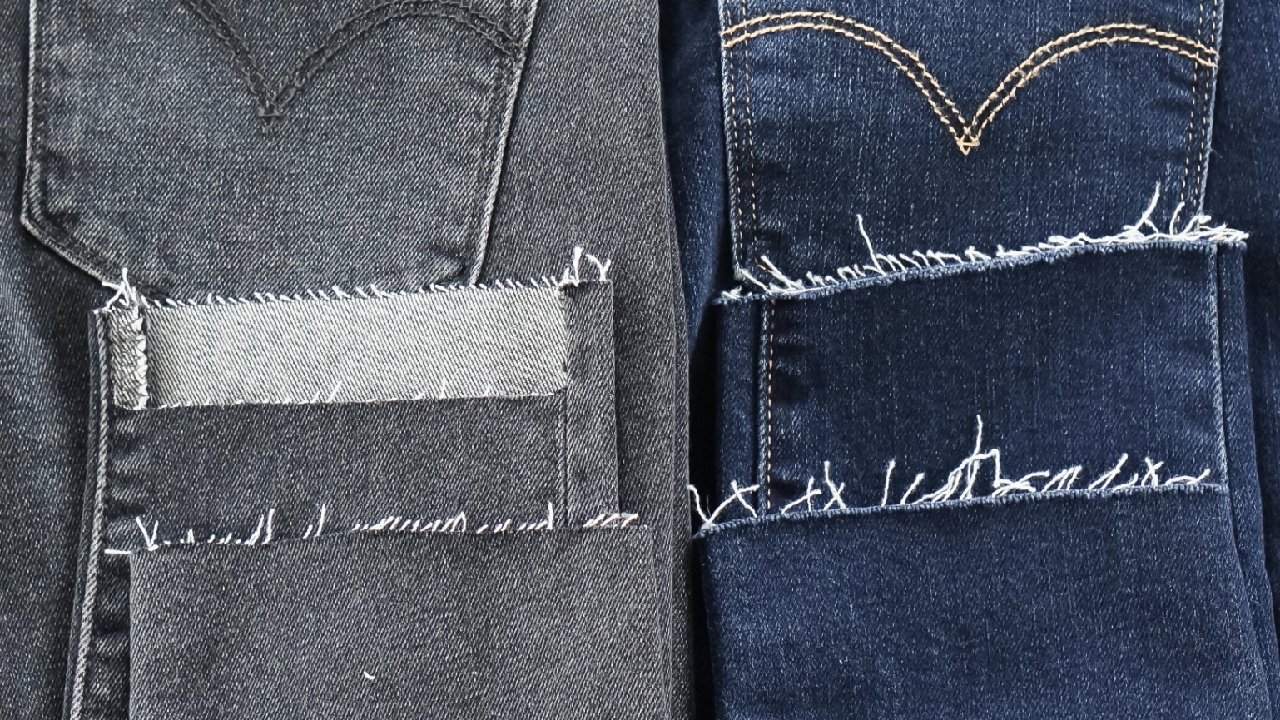
For this tutorial, I’ll be cutting a raw hem on my blue denim and a cutting a step-up hem on my grey denim.

Find the Perfect Length
I like the hem on denim to hit my ankle bone – I think it’s a flattering length for skinny jeans. Don’t be afraid to try them on to get a good feel for how much length you want to chop off. You could even compare them to a pair of jeans you own that are the perfect length – use them as a template for marking up your DIY pair.

Mark Them Up
Once you determine the perfect length, use chalk to mark where you want to cut your hem (chalk will easily wash or rub off when you’re done.) I always recommend adding a ½ inch of length to where you think you want to cut them (just to be safe!) You can always go shorter if you need too…

Cut!
Use fabric (or super sharp) scissors to cut the hem off your jeans. Cut slowly and follow your chalk mark so that you have a nice straight edge. It doesn’t have to be perfect, but you don’t want it uneven (unless that’s the style you’re going for!) I like to cut the hem off one side, and use that scrap denim as a template for cutting the other side – to ensure you chop off the same amount!

If you’re interested in a cutting a DIY Step Hem, follow all the instructions above. After making your initial cut, go back and mark another line on the front side of your jeans, that’s approximately 1 inch shorter in the length. Cuff your denim at the mark you made and cut along each side seam of the cuff (see photo below.) Uncuff your denim and then cut the front side of your denim, following your chalk line.

Try Them On
It’s unlikely you’ll achieve the perfect length the first time around. Try them on after the initial cut to see if you got the length and look you’re going for. If not, mark them up and try again!

Wash & Dry
Once you’ve got the perfect length, fray the hem. The best way to do this is by throwing them in the washer and dryer. One cycle should give you a perfectly frayed hem. Keep in mind that the hem will continue fray on its own, the more you wear and wash them.
If you like the way your raw hem looks freshly cut, leave them the way they are. Just be sure when you’re washing them you hang dry rather than tossing them in the the dryer. You can maintain your clean cut hem by occasionally trimming any white fibers that come loose.